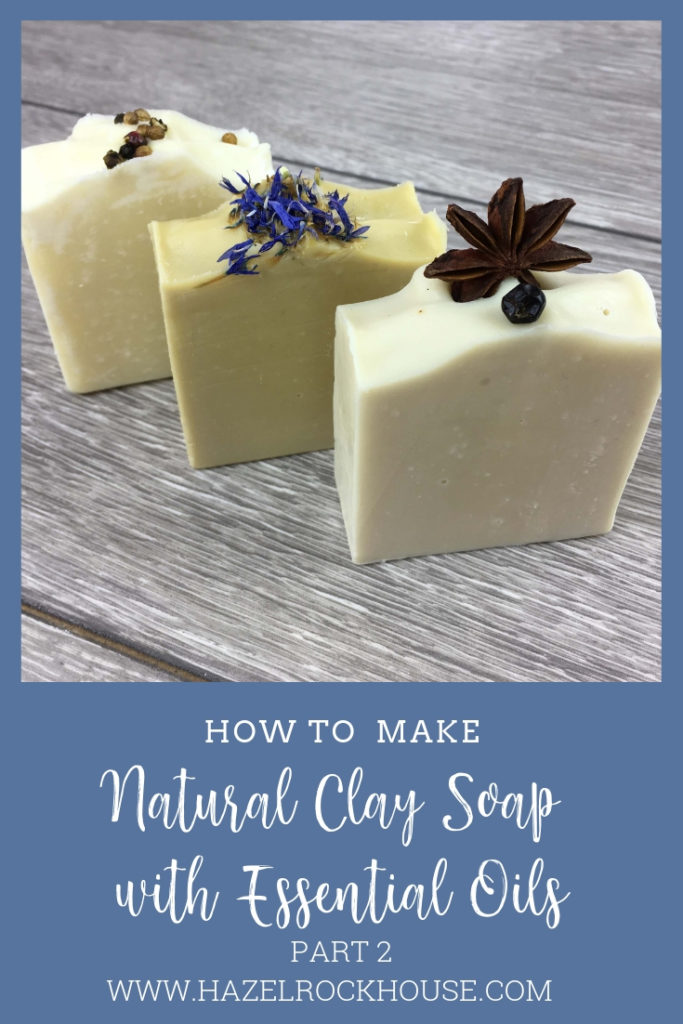
We are back with more clay soap this week. I’m completely in love with these gorgeous silky smooth bars. This is the second post about clay soap and it is part of our natural soap series which contains no artificial colour or fragrances and are palm-free to boot.
In this post, I’m using Bentonite clay, Yellow clay and Kaolin clay.
Bentonite clay is a
Yellow Clay is Illite clay, very similar to French Green clay. It is a different colour of course which is due to the different balance of minerals. As with green clay, it is most suitable for oily skin and can be a bit too drying for dry or sensitive skin. It also has exfoliating properties.
Kaolin Clay is one of the mildest forms of clay. It is suitable for all types including dry and sensitive skin. It will still remove oil and dirt but it won’t strip the skin.
As these clay soaps are part of our natural series, we are using essential oils and no synthetic colours. The resulting colour of the soap will be the colour of the clays we use as part of the recipe. If the essential oils have a strong colour (like orange does) then it will also contribute towards the colour of the soap.
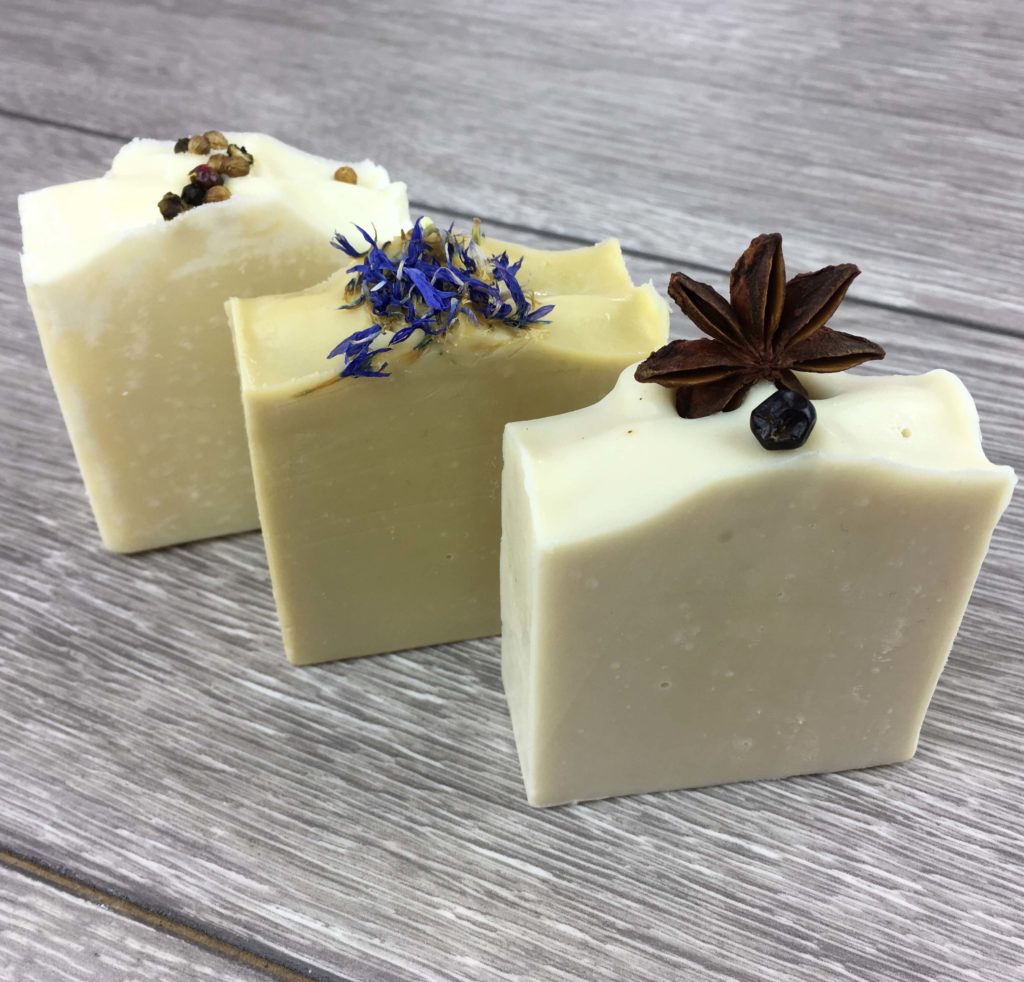
The Bentonite clay soap will be scented with Pine, Juniper, eucalyptus and peppermint and we will decorate it with star anise and juniper berries.
The yellow clay soap will be scented with May Chang and Vetivert and will be decorated with blue cornflower petals.
The Kaolin clay soap will be fragranced with Lime, mandarin and black pepper and will be decorated with mixed peppercorns.
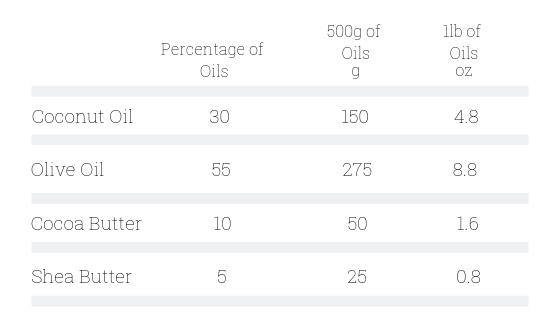
The recipe we are using is the same one we used for all our natural soaps so far. It is palm-free and vegan and so will suit most people.
I’ll also be adding 2 teaspoons of clay per pound/500g. You can add more than this if you like but it will add a very gentle scrub to the soap if added at higher concentrations.
Weigh all the hard oils into a large plastic bowl and melt them. A microwave is handy but you can do this in a pot if you prefer. Add the liquid oils and leave to cool.
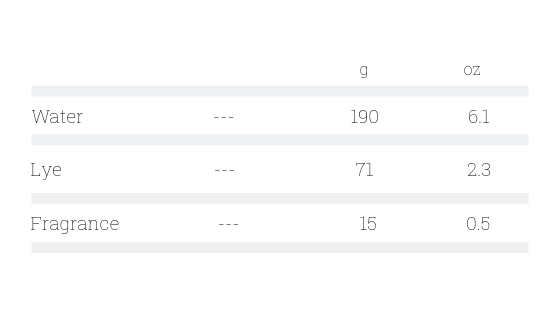
Make up the lye solution. To get detailed instructions on how to do this, grab my guide to making your first soap here.
Make sure you are wearing your goggles and gloves. Weigh out your lye and then weigh out your water in a separate container. Add the lye to the water and stir for a few minutes. Cover and then leave to cool in a safe place.
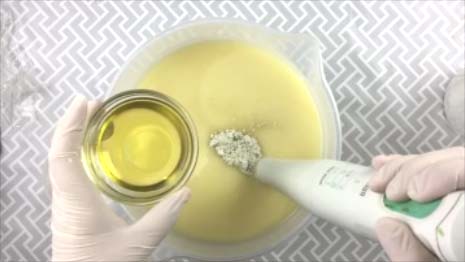
Weigh out your fragrance and clay.
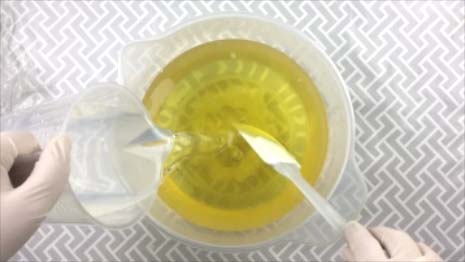
So now you should have a bowl with your cooled oils (around 25-30 degrees Celsius) and your container with cooled lye. Add the cooled lye solution to the melted oils.
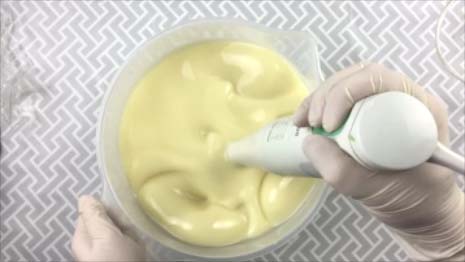
Blend with a stick blender until you reach trace. This is when you can see a faint trace of soap mixture on the surface when you drizzle the soap mix in. you don’t want it to be too thick at this stage as we will be mixing even more in the next stage.
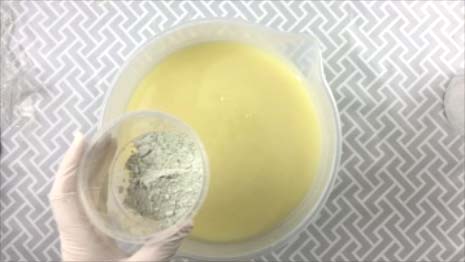
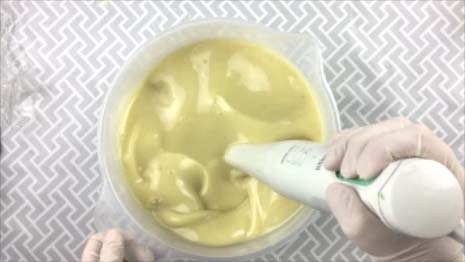
Add your essential oils and clay and blend even more. If you wanted to make a swirl in your soap you could just add clay to one part of your soap batter. Split it into two jugs and add the clay to one. Then swirl as you like. This would be particularly effective with the darker clays. I opted to just make a single colour soap with mine.
Once all the clay has been distributed, pour the soap mixture into a lined mould.
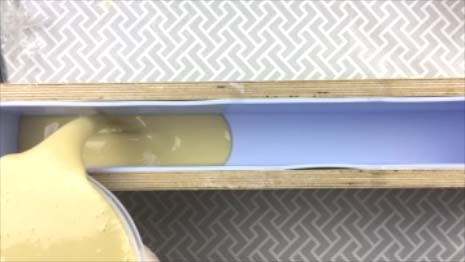
Texture the top of the soap if you like. For all the clay soap in this series, I’m just pulling the soap in from the sides with a teaspoon. You can texture whatever way you prefer.
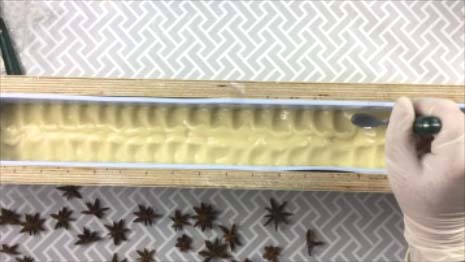
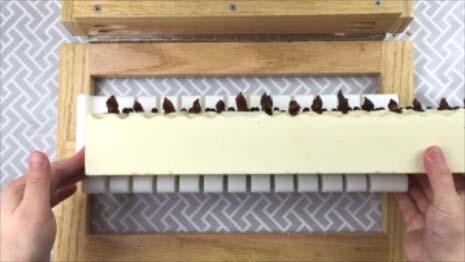
I’m adding some star anise and juniper berries to the top of this soap for decoration.
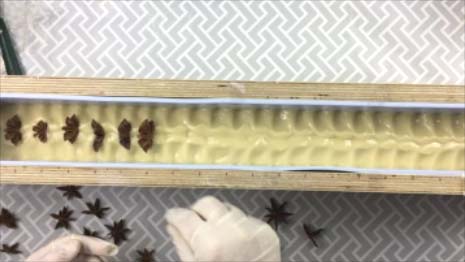
Leave to set up overnight. Then remove from the mould, cut and leave to cure for 4-6 weeks. Make sure that there is good air circulation around the soap so that water can evaporate from it.
The yellow clay and kaolin clay are made in just the same way, each having its own distinct characteristics formed by the combination of clay and essential oil.
Coming soon will be a guide to clay in soap making, which will appear in our resource library.
If you’d like to sign up for access to the resource library, it is free to email list members. You can sign up here or in the side-bar. You can unsubscribe at any time.