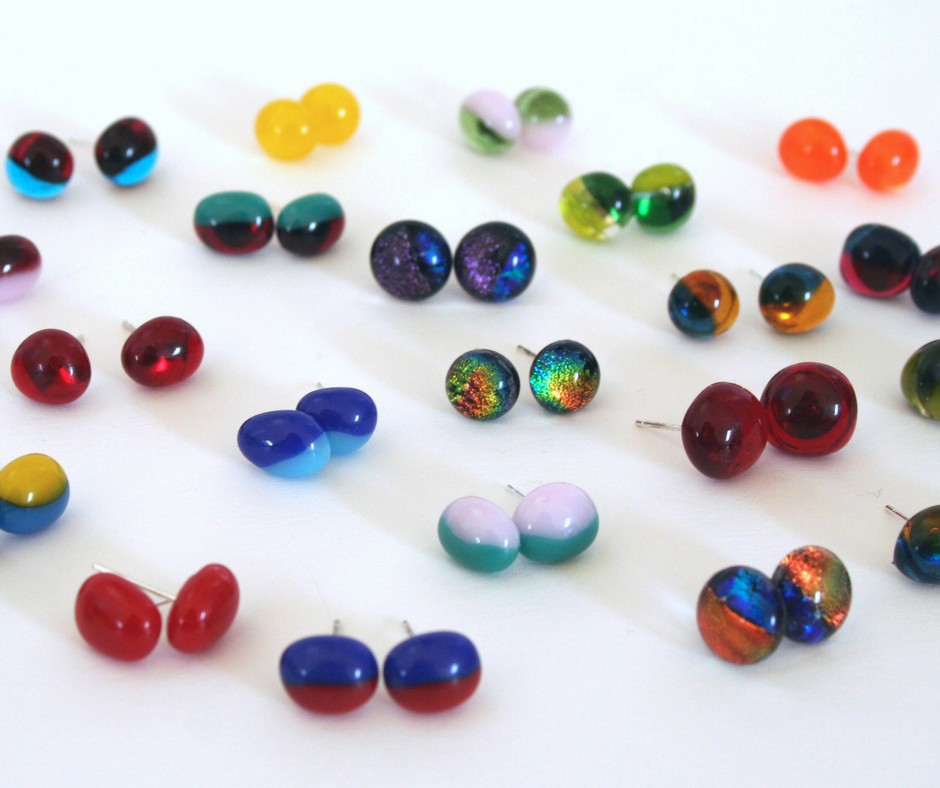
I’ve been making soap for well over 8 years now and it has become my full-time job. But as so often happens…once your hobby becomes your job, you need a new hobby!
Spending a lot of time at craft fairs selling soap also opened my eyes to the possibilities of fused glass.
I tried to resist for a long time, knowing once I started I would be hooked. I instead bought countless pieces of glass for friends and family as gifts but also for myself. Yes, I love shiny things. For a while, that was enough, until a good friend suggested we go to a fused glass jewellery making class.
Well, that was that. I knew I had to begin glass making.
So here are some tips for setting up a small hobby level fused glass studio based on my adventures in glass so far.
The kiln is the key piece of equipment you need to get started with fused glass (of course you can’t fuse glass without one). You can rent space in a kiln if you are lucky enough to live near a glassmaker that offers such a service. I did, but as I was only making small pieces of jewellery this wasn’t really cost effective for me.
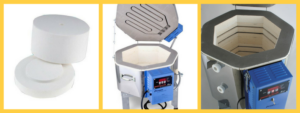
Microwave kiln, Glass kiln (element in the lid), Ceramic kiln (element in the kiln body)
I tried a microwave kiln first. On paper, it seemed like a good idea. But one melted microwave later and I sent it back to the store. I wouldn’t recommend them.
Eventually, I found a kiln going second hand. It is a paragon 7 and is still working perfectly today. I find it great as it is just the right size for me. Although I am considering buying a larger one now that I am branching out into bespoke glass panels.
Some things to consider when buying a kiln (new or second hand)
Are you going to be making only fused glass or do you want to make ceramics as well? Fused glass kilns generally have the heating element in the lid whilst ceramic kilns have heating elements in the kiln sides. Fused glass is generally created flat(ish) so a heating element in the lid heats the surface evenly. Glass kilns heat up high enough for some of the low fire clays but not high enough for all clays for example porcelain. So if you also want to fire ceramics you should choose a ceramic kiln as you can fuse glass in it as well. If you are only making fused glass then choose a glass kiln as the temperature will be more evenly distributed over the surface of the glass.
Manual or programmable kiln?
Manual kilns have a power switch and a dial to control the temperature. Inside they have a pyrometer to detect the internal temperature. But you are the one who gets to have the control. During a firing schedule, there may be 4 or 5 different temperatures so you will need to be with your kiln throughout the firing to change the temperature when required.
A programmable kiln has a temperature controller which automatically changes the temperature for you and even turns the kiln off when it is finished. You can go about your day as normal or run your kiln while you sleep. You can usually set a few different firing schedules in each programming unit. I would recommend this one.
What size will you need?
If you only intend to fuse small pieces of jewellery in your kiln you will need a much smaller one than someone who wants to fuse large pieces. Or do you need to produce a large number of pieces to sell?
Larger kilns tend to need a dedicated electrical supply to function. Smaller kilns can use the normal electrical sockets in the house.
You should also have a think about where you will place your kiln. You should make sure it sits on a heat resistant surface and is clear of any curtains, fabric or other flammable materials. Make sure there isn’t a shelf close above that would be affected by the heat and make sure you have plenty of ventilation.
Tools for cutting glass.
For a beginner, the only tools you will need are some tools for cutting. You need a glass cutter which has a small wheel inside which scores the glass. There are a wide variety of designs and shapes available depending on which you prefer. Most use oil for lubrication and some don’t.
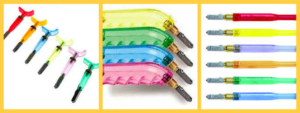
Examples of glass cutters
Once the score is made you can use a pair of breakers or running pliers to separate the two pieces. Breakers/runners exert a pressure either side of the score line which makes the glass split along that line. This works best with straight lines on flat pieces of glass.
If you are cutting curves or circles you can use a pair of grozing pliers instead. With grozing pliers, you are pulling or twisting the piece you want to remove after you have made a score. Mosaic nippers are also very handy if you want to split very small pieces or nip small sections from a glass rod.
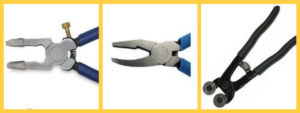 Breaking / Running Pliers, Grozing Pliers, Mosaic Nippers
Cutting Surface.
You will need a surface to cut on. You can use something as simple as a piece of cardboard to protect your table. Many people use a crafters self-healing cutting mat. Once you are cutting large pieces of glass you may want to invest in a cutting surface such as the Morton system. This is a plastic surface with spaces in which allows any small fragments of glass to fall away so you don’t cut yourself with them. It has a variety of handy attachments which aid your cutting and a ruler to help measure. There are many other cutting systems such as the G-manu, Cutters Mate, and the Beetle Bits system.
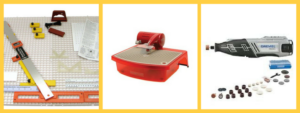
Morton System, Taurus Ring Saw, Dremel Drill
Once you have got the hang of this you might consider investing in a larger cutting device such as the Ring saw. They are a reasonably large investment but allow very specific cuts to be made. Definitely very useful if you plan to sell your work.
Other useful pieces of equipment you may find you need around the place might include a Dremel style drill for cutting holes in glass. You can use this along with a diamond drill bit to make holes which you will need if you make glass jewellery or hanging pieces such as suncatchers. You can then insert the wire or whatever you are using directly through the glass.
Cleaning up.
Cutting glass results in tiny splinters which will fall onto your cutting surface. You need to be able to clean these up quickly to avoid cutting yourself. A dustpan and brush will do. You could use a handheld vacuum cleaner (one with a HEPA filter is useful if you are working with glass powders). Or I find wiping the surface with a damp wipe or disposable kitchen towel picks up any glass fragments then it can be thrown away in the rubbish bin.
Coldworking. Grinding and Polishing.
For an absolute beginner, you might want to try coldworking by hand using diamond hand pads. These are pads which are encrusted with diamond fragments in various sizes. They come in 60, 120, 220 and 400 grit and you would start with 60 grit (the coarsest) and then work your way through each one in order to achieve a smooth finish. To be honest this work is so tedious and time consuming that most people don’t bother. It is a much better idea to invest in a tabletop grinder. These are relatively inexpensive and are worth every penny in my opinion! They are cooled by water and enable you to quickly and easily smooth any edge.
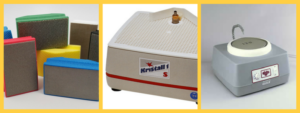
Diamond hand pads, Benchtop grinder, lapidary grinder
If you decide to go on to larger things you can invest in a wet belt sander or a flat lap (lapidary) grinder. Both of these options would be for the serious enthusiast or professional glass artist as some require a dedicated electrical supply (although you can get some smaller ones which run on a domestic supply). They are also very messy pieces of equipment and would be more suited to an outdoor shed or workshop. (You wouldn’t want one in your house!) You would also need both of these to be connected to the water supply and have some means of disposing of wastewater containing glass powder.
The flat lap grinder is very useful for grinding flat surfaces or straight edges. It is particularly useful for grinding the edges of dropout vessels.
The wet belt sander is a little more versatile as it is able to smooth rounded or curved edges as well which is useful if you make large glass plates or bowls.
Don’t forget these methods of grinding would also require the pieces to be fire polished if you are looking for a really smooth glossy edge.
In concentrating on the equipment I nearly forgot a few other important things for your studio. Something to sit on, a table to work at, storage for your glass and maybe a radio or mp3player. And don’t forget the glass itself…but I think that’s an entirely different blog post!
So there you have a brief rundown of some of the equipment available for setting up a small fused glass workshop. It is not an exhaustive list by any means but it will get you started on the road to your first glass workshop. I have been adding these pieces of equipment over the last couple of years so you don’t have to go out and buy all these at once. Start with the basic glass cutting equipment and a kiln and go from there. Have a great time doing it!

