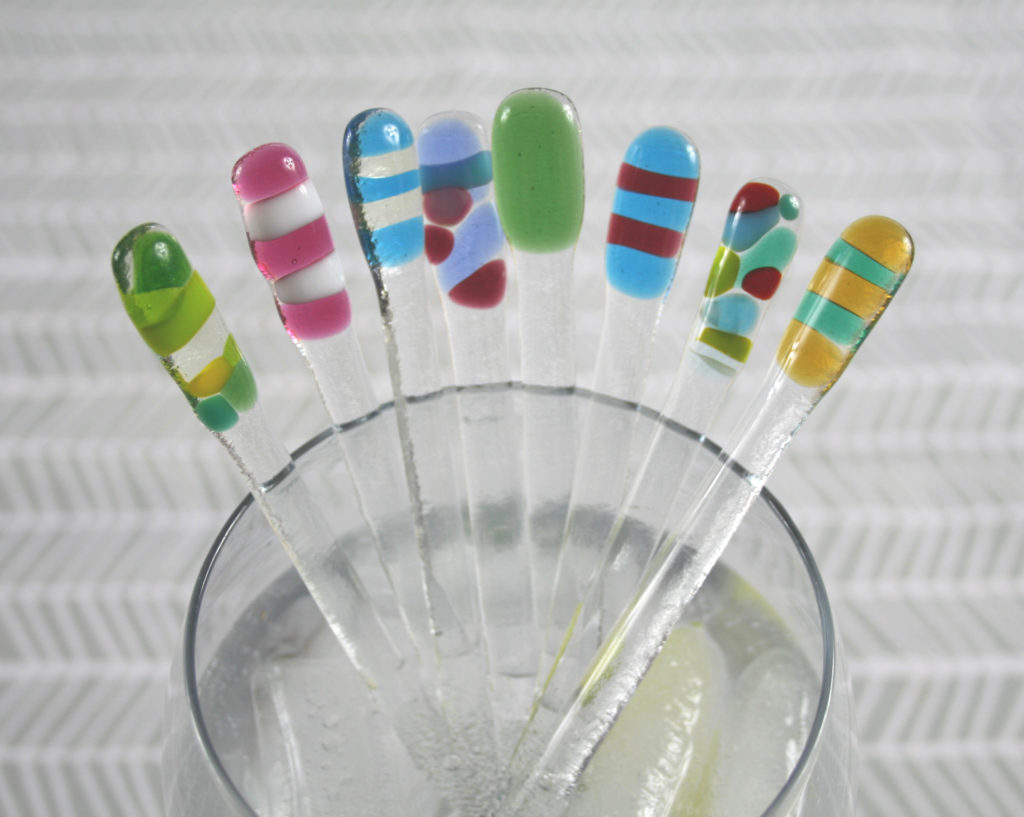
There is nothing more pleasant on a hot day than sitting outside with a cold drink. A cool glass, condensation trickling slowly down the side and the tempting clink of ice cubes. Whether you prefer gin or lemonade, iced tea or prosecco, you’ll love to have a handmade swizzle stick to bling up your glass.
They are very easy to make so they are perfect for beginning fused glass makers. Even experienced glass artists will love them because they are an excellent way of using up your scraps. Even tiny bits are useful.
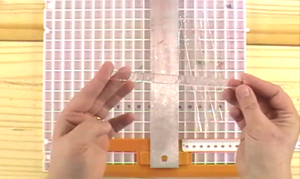
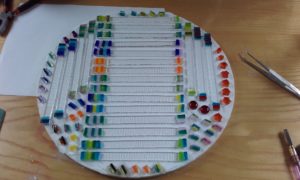
I usually buy my Tekta in 30cm by 30cm sheets. To start, cut one of these in half. This will give a piece 30cm by 15cm.
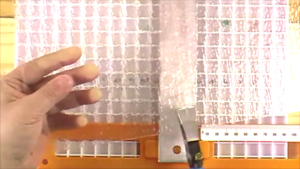
Cut 1cm wide strips from this piece giving us lots of thin pieces of tekta 15cm x 1cm. I can fit 22 of these in my Paragon 7.
Put these directly on a lined or kilnwashed kiln shelf as they are too fiddly to move once they are made. It’s much easier to carry the whole shelf across.
We need to make the handle next. Get all your little pieces of glass left over from other projects.
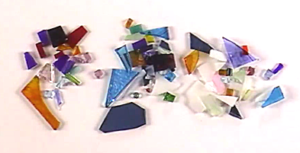
You can make stripes by cutting scraps into 1cm wide pieces and arranging them on top of the strip of tekta. We want a handle around 3cm long. Or you can make a collage out of tiny pieces.
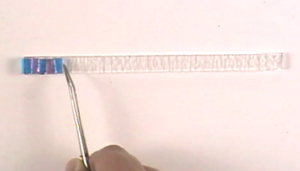
We do the same at the other end to make the little blob that stirs the drink. This is much smaller around 1-1.5cm long. You can use very tiny chips of glass and pile them on. The arrangement is up to you.
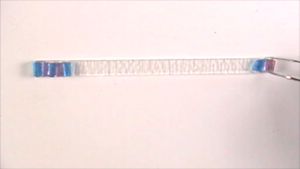
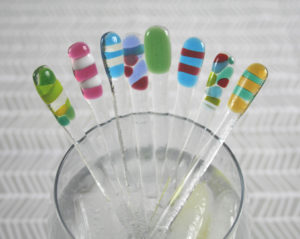
Selecting the colours is the best bit. You can make them in all sorts. I love to use contrasting colours which really make your swizzles pop. Or you could use shades of one colour. You can load them with your favourite frit combination. I love to make multicoloured ones but you could make them from one colour if you like.
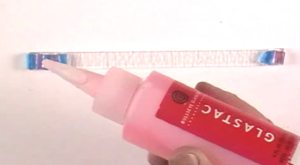
Once you have the glass arranged the way you want it, you can stick it down with glastac. If you prefer you can use white glue but you will need to put this on first.
There is usually plenty of space around for a few pairs of earrings. I like to use up every tiny bit of space before I run the kiln.
Carefully bring them over to the kiln and place inside. The schedule is as follows. It is the standard Bullseye schedule for a full fuse.
Runtime = 12 hrs
| RATE – Degrees/hr | TEMP – Set point | HOLD – Soak | |
| Segment 1 | 222°C/hr ( 400°F) | → 677°C (1250°F ) | 30 min |
| Segment 2 | 333°C/hr ( 600°F ) | → 804°C ( 1480°F ) | 10 min |
| Segment 3 | 999°C/hr ( 999°F ) | → 482°C ( 900°F ) | 60 min |
| Segment 4 | 83°C/hr ( 150°F ) | → 371°C ( 700°F ) | End |
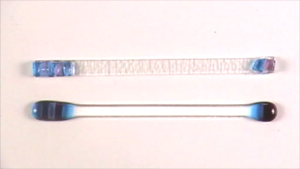
Once they are fired they are ready to use (after a wash of course!) You will see that the handle (with 2 layers of glass) has rounded at the edges and flattened. The smaller piece on the bottom has rounded up into a blob which is perfect for stirring those drinks. The single layer of glass forms the stick and this will pull in at the sides and become thinner and rounded on top.
You can make these as a set with each one the same or a variation on a theme. Sometimes I make sets which have the same design but differ in colour so each friend in the group knows which glass is theirs.
These are fun to make and a little bit different. I love them because they use up all my scraps and I’m a little bit obsessed to be honest! And of course my friends and family love them too… because it usually means I’m making the drinks!