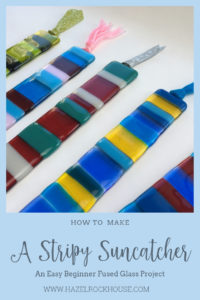

One of the things I love so much about glass is its transparency. The way light can pass through bringing the colour of the glass into the room beyond. The colours are so intense they just beg to be viewed. In this project, we will make a stripy fused glass suncatcher to hang in your window and catch these rays.
For this project, you will need
3.5cm x 24cm strip of Tekta (or whatever size you want your suncatcher to be)
Scraps of different coloured glass
Cutting and breaking tools
Glastac or other glue
A surface on which to cut (a cutting mat or similar)
A small loop of copper or nichrome wire.
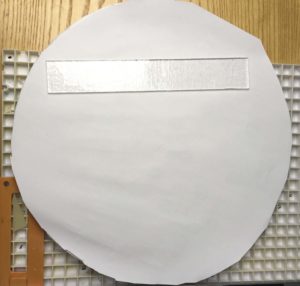
Cut your piece of clear glass to size and place on a kiln washed shelf. I’m using thinfire paper instead. We will build the suncatcher directly on the shelf so that we don’t have to move it afterwards.
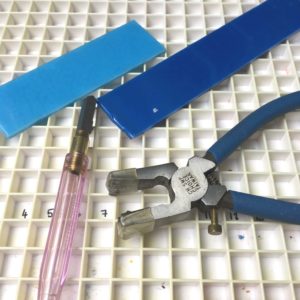 Gather your cutting tools and your pieces of glass. If you don’t have big enough scraps, cut some strips of glass 3.5cm wide instead.
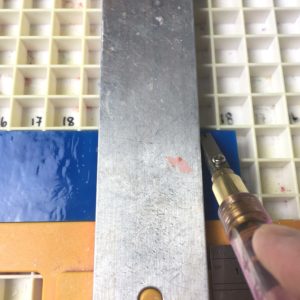 Start cutting the strips in your chosen colours. You can cut them in random sizes like mine or you could make them all the same size. It is up to you.
Try and cut all the pieces as accurately as possible as they will cause the edges to be uneven when they are fused if any are too big or small.
 Lay all your cut pieces out and arrange them on top of the piece of clear glass. If any are too big, trim them down! Try to get a good spread of colours and don’t put two pieces the same beside each other.
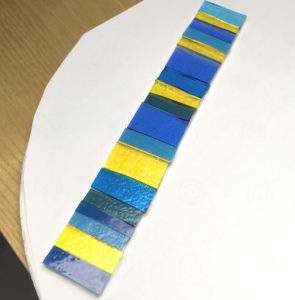 Once all the pieces are laid in place, you can glue them all down with Glastac or similar glue.
 Remove the end piece from the suncatcher and put in your loop. In the end, I decided one loop would do. You would need two loops if your suncatcher is wider than this.
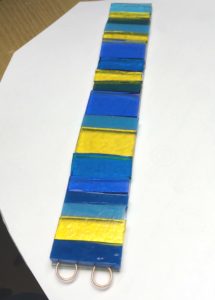 Glue in place and then put the end piece on top of the ends of the loop.
You are now ready to fire your suncatcher.

You can make them in all sorts of colour combinations.
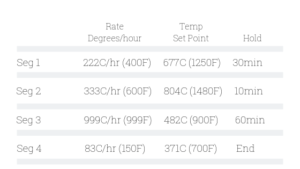
The fusing schedule for this is the standard Bullseye full fuse schedule for 2 layers of 3mm glass.
Don’t forget to let the kiln cool down before opening it. I’m so impatient that I want to open it as soon as possible. I’ve learned the hard way about thermal shock!
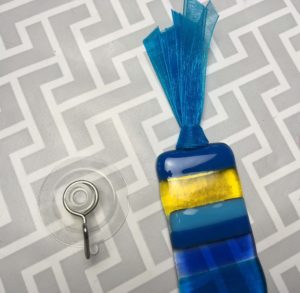
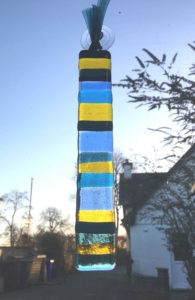
Once you have removed your suncatcher from the kiln it is ready to hang. I like to add a few ribbons to the top. You can hang them in the window with the suction hooks that you can buy in the hardware store.
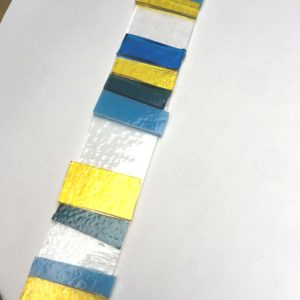
As you can see, it is very difficult to get the edges to be entirely straight. Even if your cutting is exactly accurate, it won’t be easy to get a perfectly straight line because different colours of glass melt at slightly different temperatures, making one melt a little more than others. The only way to correct this is to grind the edges afterwards and fire polish. In such a simple project, I don’t feel it is necessary to do this. I like the slight distortion at each colour as it helps to make the piece look handmade.
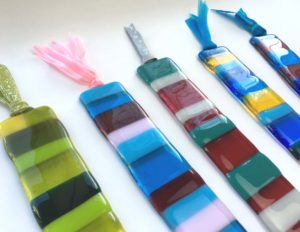
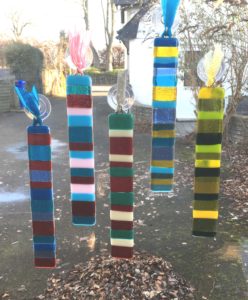
So there you have it. Gorgeous shiny suncatchers. Very easy to make and a great result for beginning Glassies.
If you’d like more of this kind of thing, please sign up for our email list and you’ll never miss out. Sign up is in the right-hand bar.