
Inspiration comes in many forms and one of my main inspirations is the natural world. There is so much variety in colour and texture and I hope to capture a little bit of that in my glass. Some of you might also know about my interest in interior design. My own style is a mixture of things I love but it always has a little nod to mid-century style.
It is in that spirit that I make the Lollipop Garden pieces. They are based on a wildflower garden idea but with a retro hint. They are not complicated to make and I love the way the design builds up in layers.
You will need
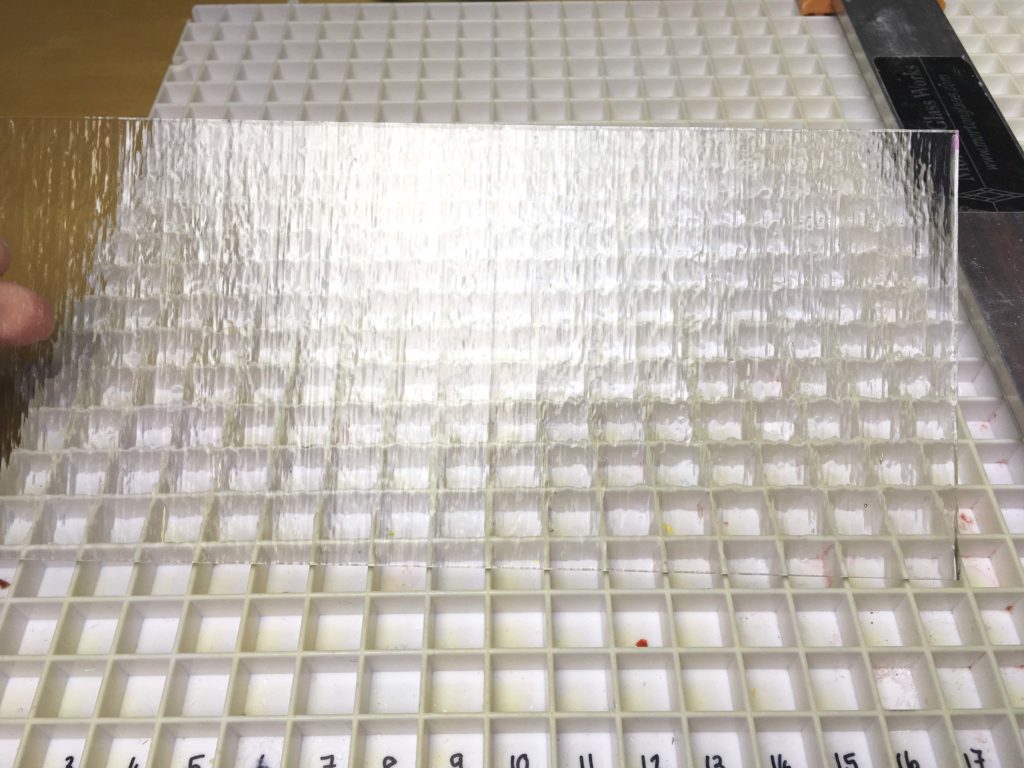
A piece of Tekta (or other clear glass) 15cm x 24cm (or use a custom size)
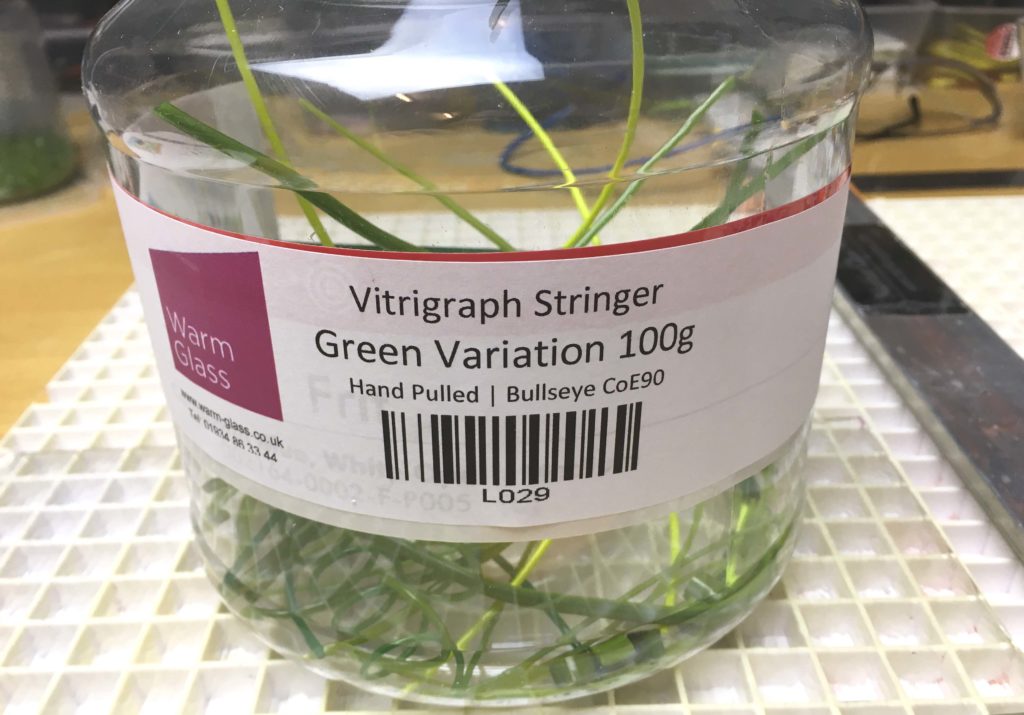
Some green vitrograph stringers. If you don’t have these you could always slump some green glass stringers in a wave or curved mould. Some like to bend them over a candle but I find it doesn’t give a graduated enough curve.
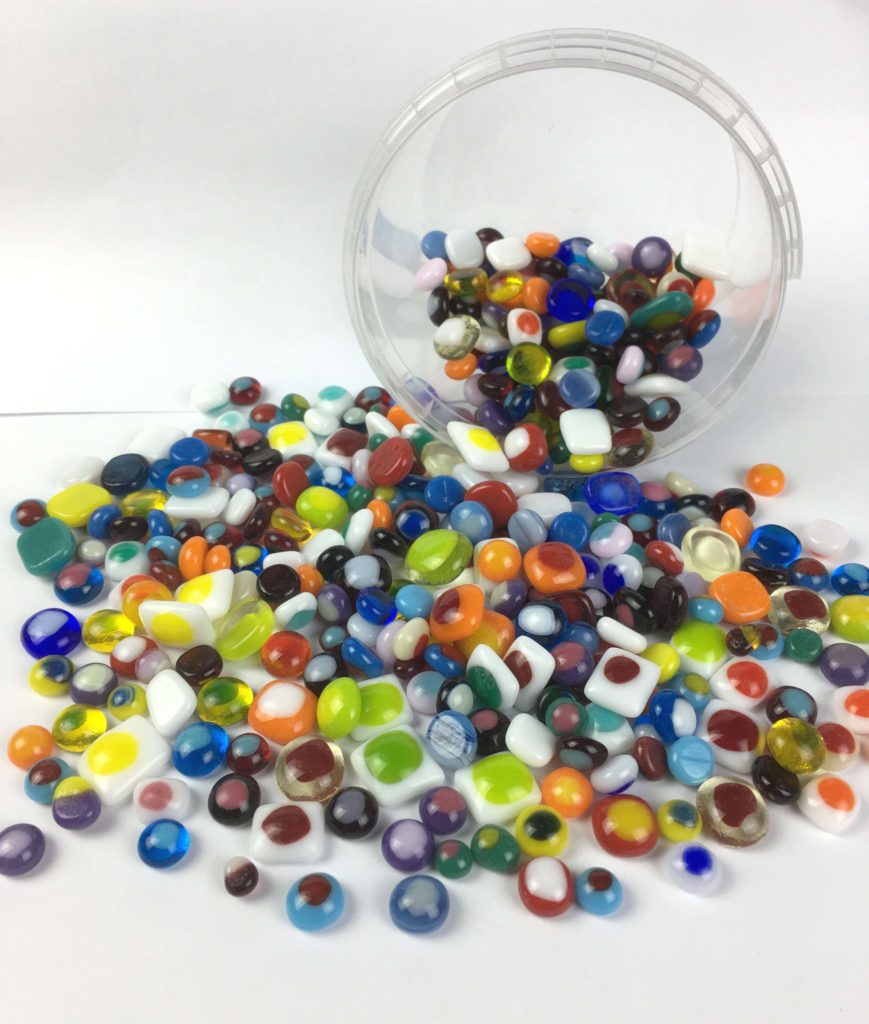
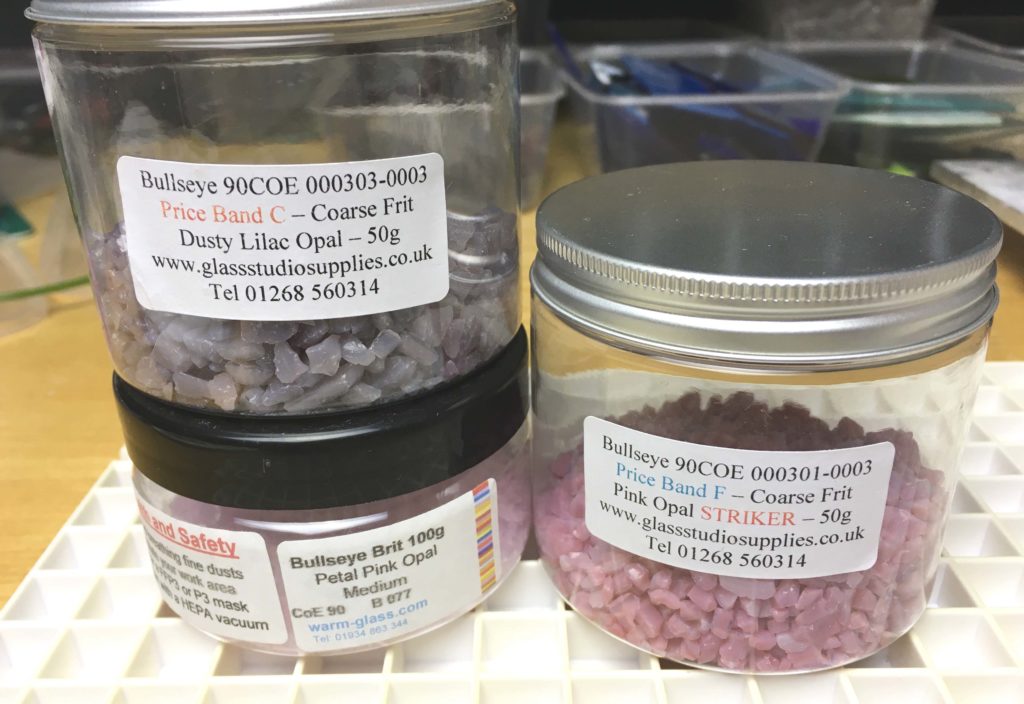
A range of frit in your chosen colours. I’m using pinks. You’ll also need some greens for the grass
Premade lollipop heads (I’ll show you how to make these). Made with scraps of coloured glass and coarse frit.
Glastac Glue (or other)
A curved slumping mould. If you don’t have one of these you could make the piece flat and mount it in a frame instead.
Millefiore in your chosen CofE (optional but lovely)
To make the Lollipop heads.
Cut a scrap of glass into a small square. Add a smaller square of glass or piece of coarse frit on top.
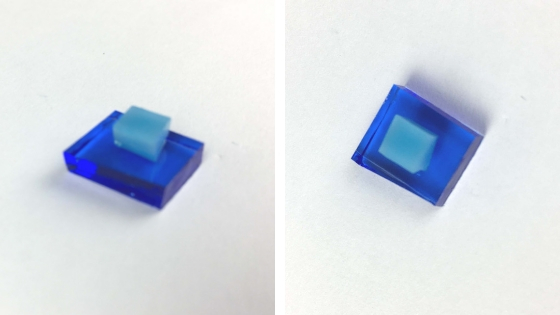
Make a lot of these!
Fuse them at a full fuse.
I usually do a few of these to fill up the small spaces in my kiln every time I do a full fuse. Then I always have a stash of them when I want to make a lollipop garden.
To make the main piece.
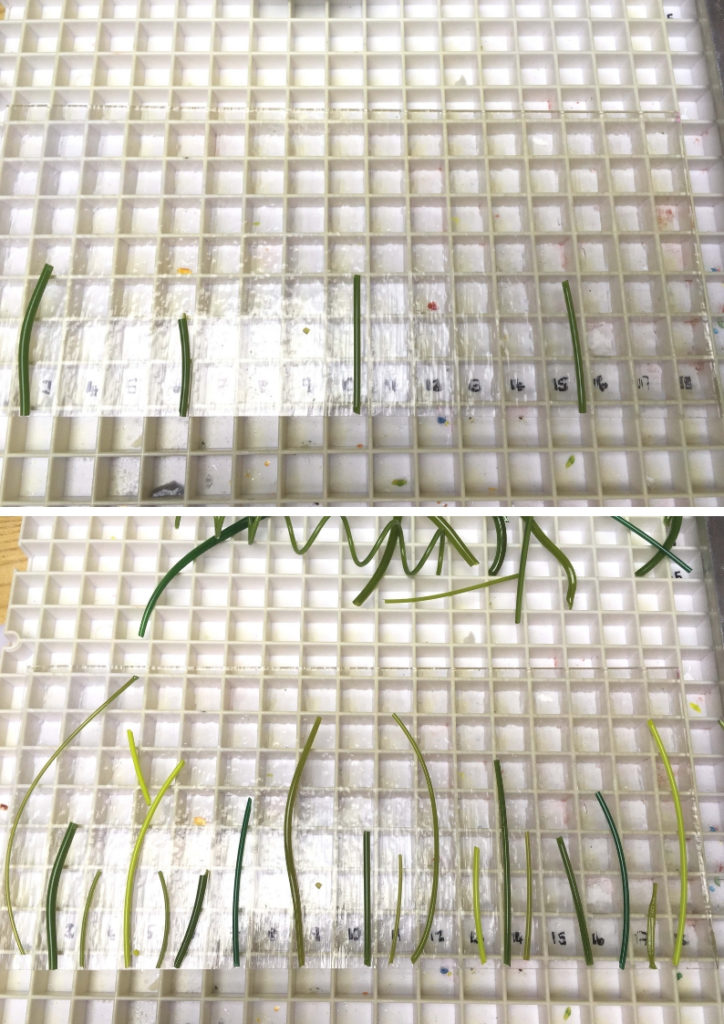
Cut your Tekta to the correct size.
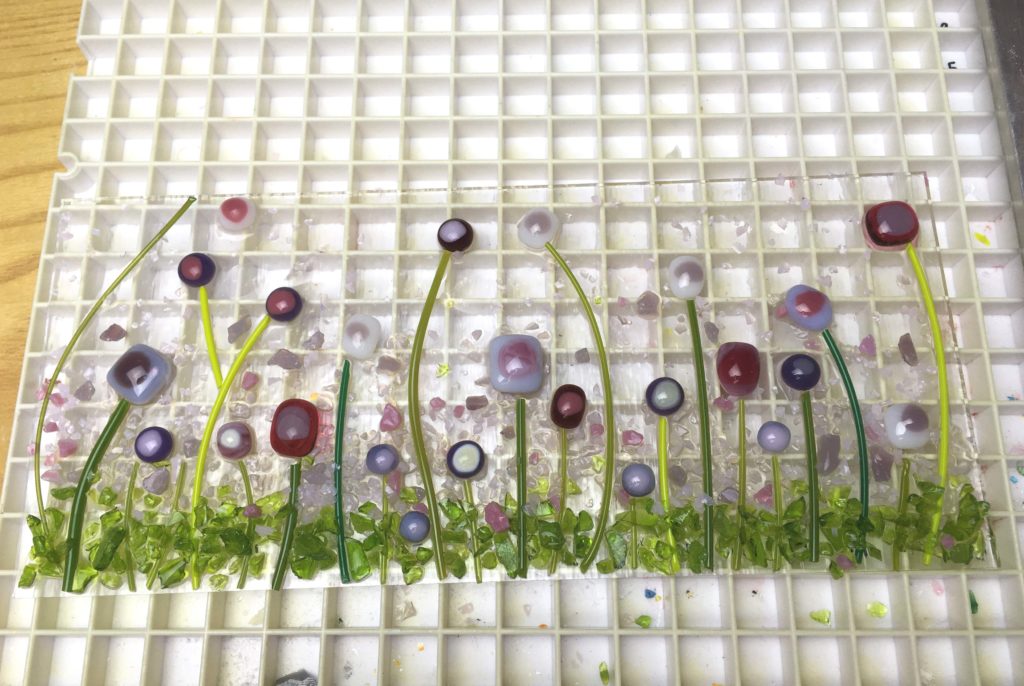
Start placing the pieces of green vitrograph stringer in place to represent the stems of the flowers. I think it looks best with a variety of shades of green and thicknesses of stem. The advantage of using vitrograph stringers over ordinary stringers is that they sometimes have a different width along the same piece of stringer. This makes it look more convincing as a stem. Vary the lengths of each stem until it looks pleasing to your eye.
Next place the flower heads. Just add the heads to the top of the stems and even in between if you like.
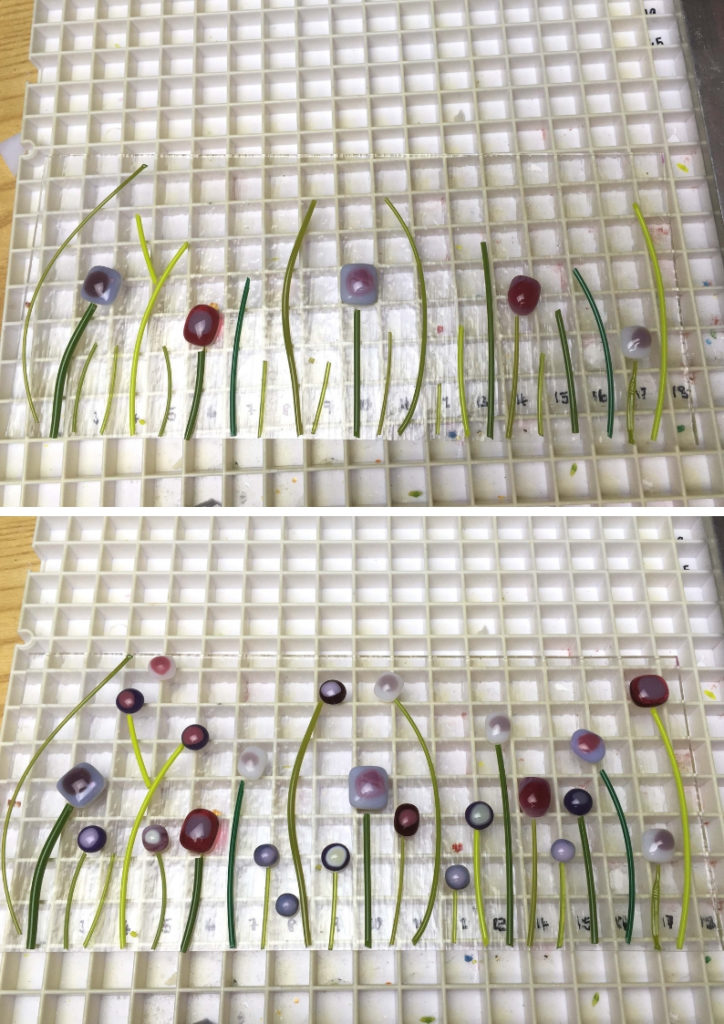
In this one, I have used pinks and purples that go together but there is no reason why you have to colour coordinate like this. Feel free to choose whatever colour you like. A range of different sized flower heads works really well too.
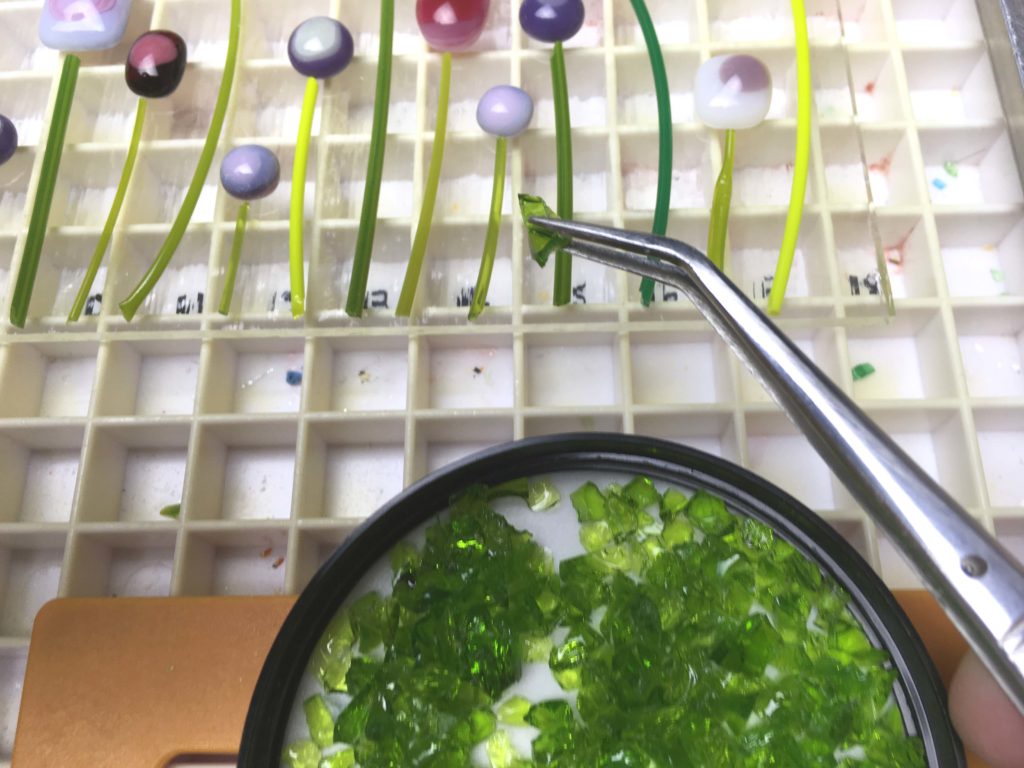
Next is the grass. I have chosen three frit colours for this. You want a mixture of transparent and clear to give the feeling of variation and movement in the grass.
Use tweezers to carefully place the larger pieces of coarse frit into place.
Keep adding frit until you are happy with the outcome. I like to use some medium frit along with the coarse frit just to give it a bit of interest.
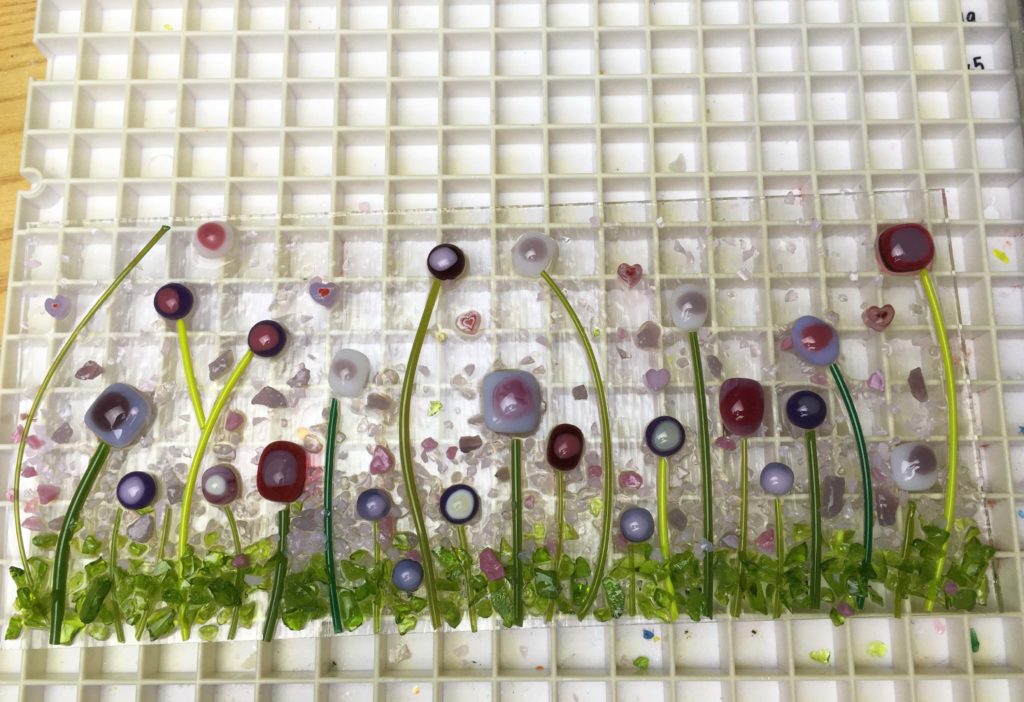
We need to add a few more flowers so choose some frit in appropriate colours depending on the colours you chose for the flower heads. I’m using a range of pinks in both coarse and medium size.
Sprinkle these amongst the flower heads so that the frit looks like flowers in the background of the scene. Keep adding until you like it but don’t put too much on as it can look too busy.
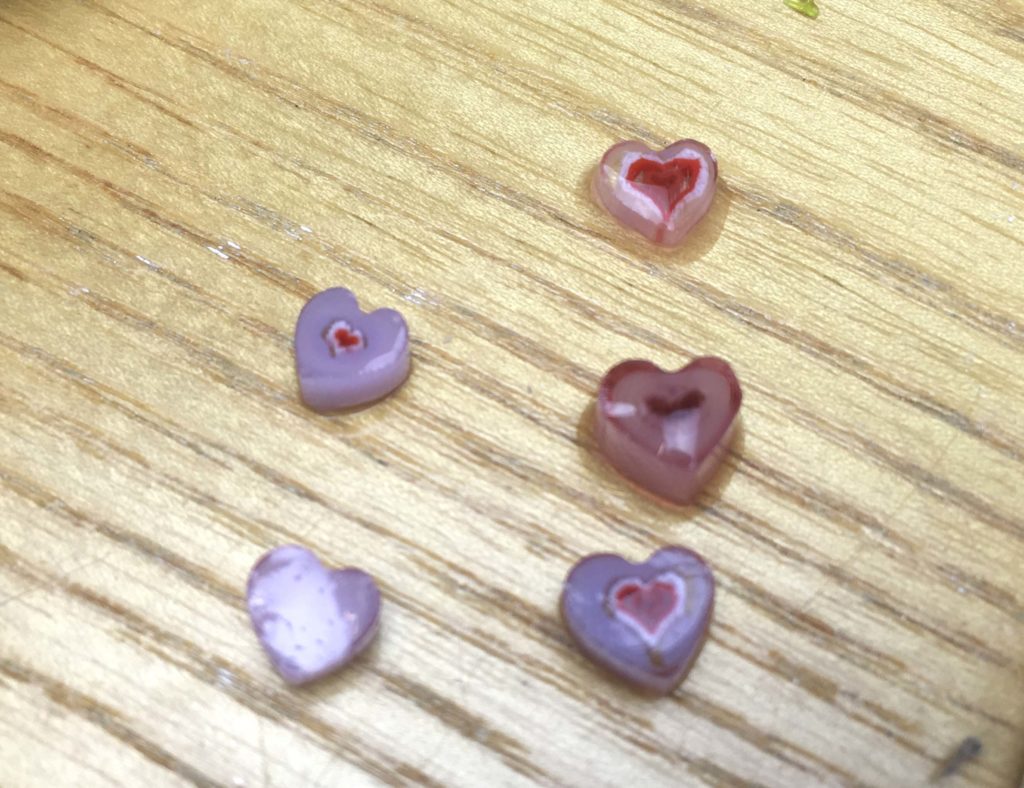
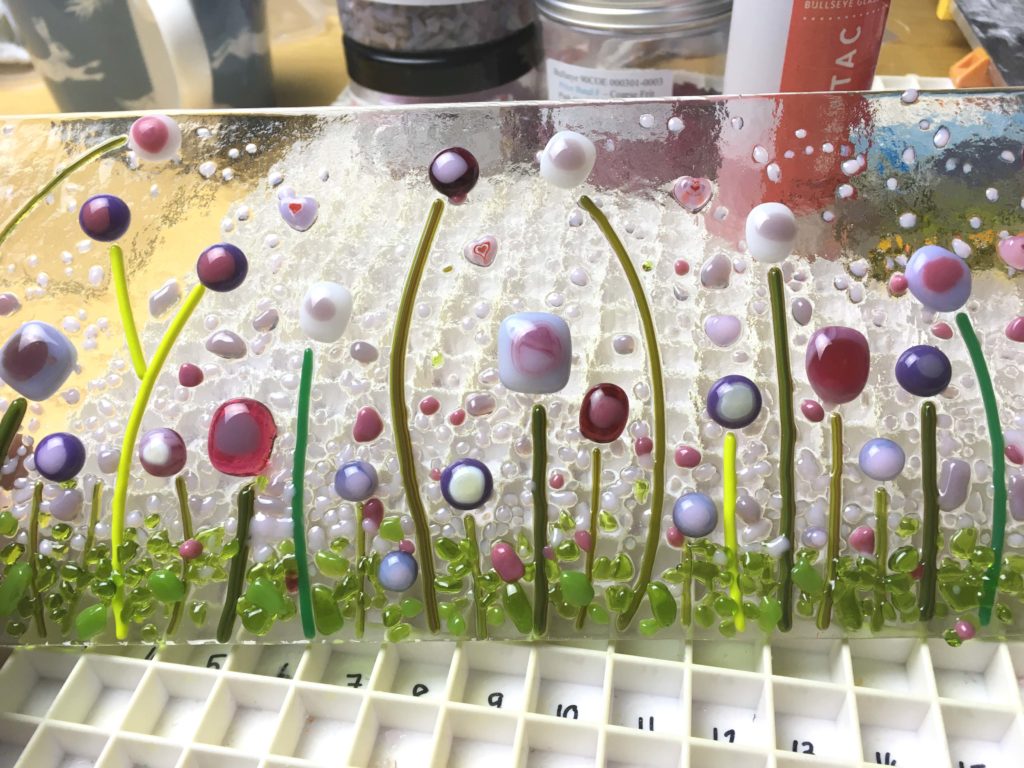
If you want to you can add some millefiore. I got these gorgeous little heart millefiore from Tabitha’s Glass Emporium. I love them so much but I only wanted to use a few in this design just as an accent. They go perfectly with the colours I have chosen.
I have put the little hearts up near the top of the flower heads, so they can be clearly seen. I think they just make the piece.
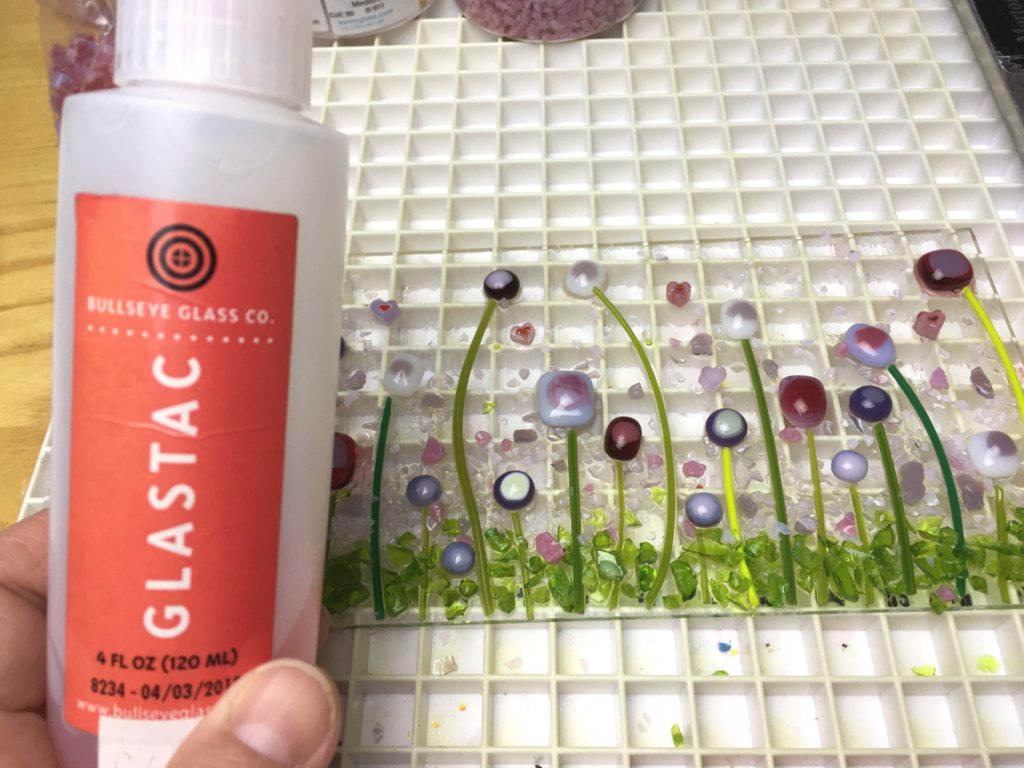
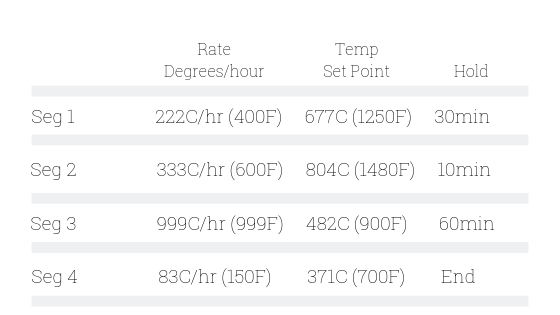
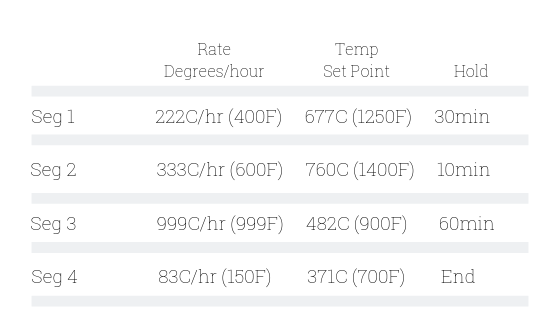
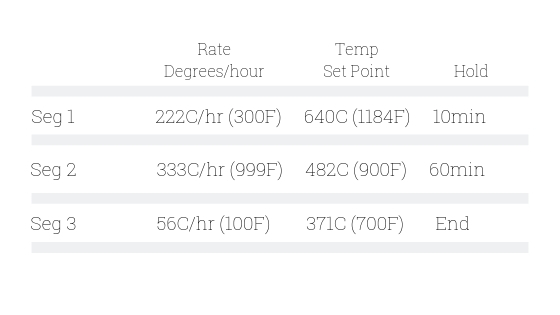
Stick everything down with glasstac (or something similar). Once you are ready, place into the kiln on a kiln washed shelf or on thinfire paper and use a tack fuse schedule. I use the normal bullseye schedule for this (see table below)
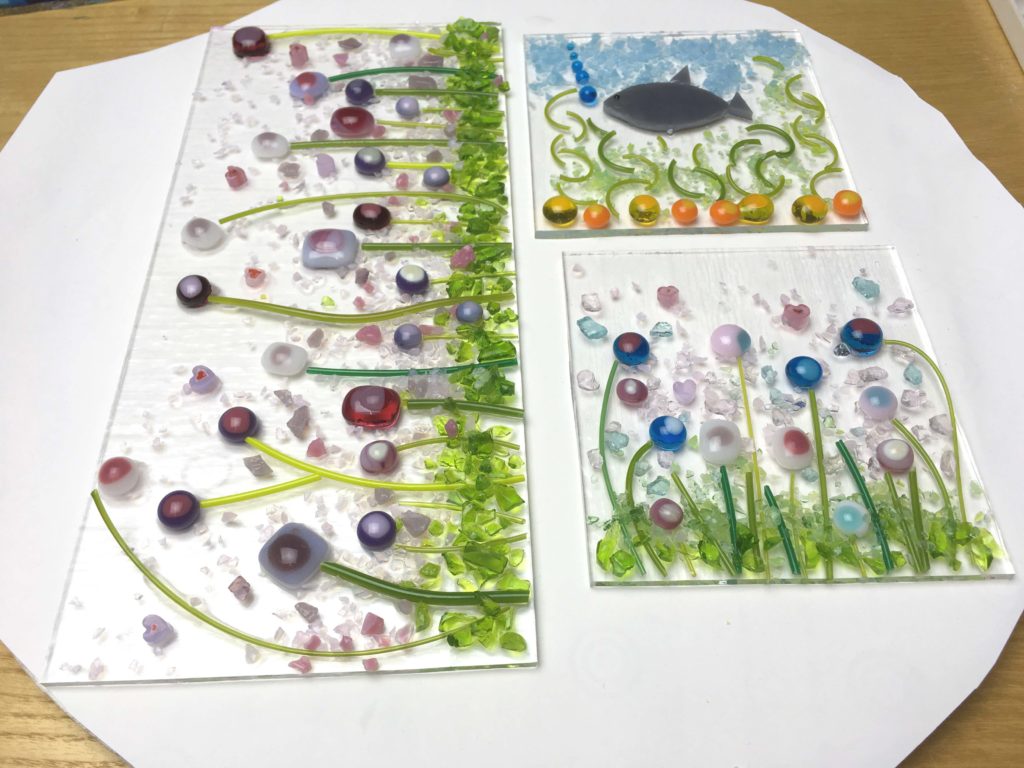
You can make smaller versions of the same idea and mount them in box frames to make them into gorgeous little presents.
Check out the fish picture my youngest son made…He’s 9.
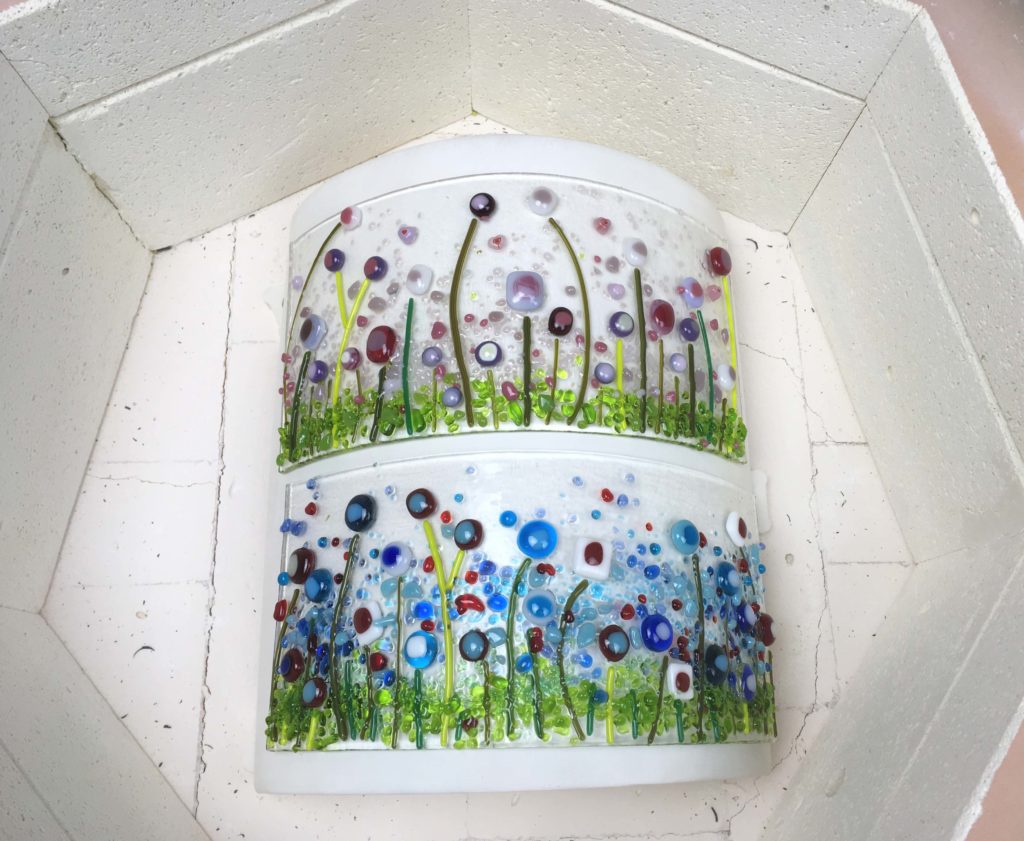
Once it is finished, remove it from the kiln. We still have to fire this again to shape it into a curve. Looking good so far.

Remove the shelf from your kiln (you don’t need it and you can be working on filling it for the next run)
Place the curved mould on the short kiln posts. It would probably be fine just sitting on the bottom but I like to raise it up so the air can flow around it easily.
I know this is a different one, I didn’t manage to get a picture of the pink curve at this stage. Still, you get the idea!
The firing Schedule for this one is a standard slump for bullseye glass given in the table below.
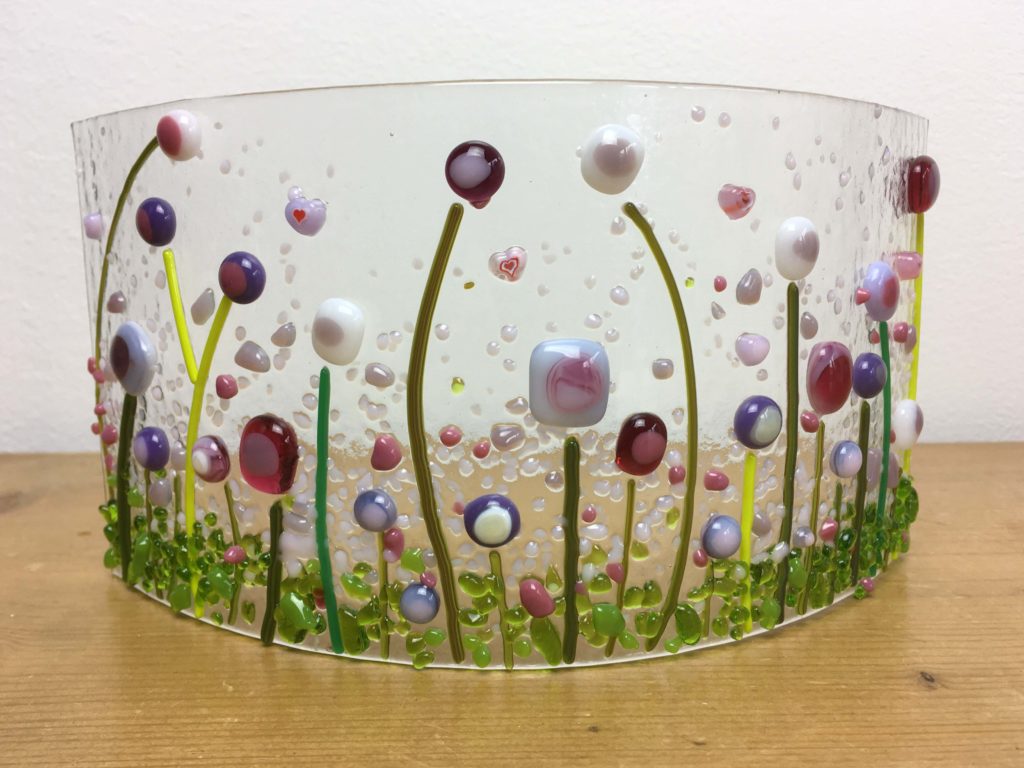
The lollipop garden is finished.
So another project completed. I must say I’m a bit obsessed by these at the moment and I’m doing a bit of research around new ways to make the flowers. I’ll keep that for another post! I hope you like them.
Fantastic Emma. Well done 👍
Thanks Mum!