Today I have not one but three projects for you. All on a Christmassy theme. These are little decorations for your Christmas tree. I can’t wait to put mine up!
Each one is made with a square of clear glass turned on its point and each is a brilliant way of using up those little scraps of glass you might have lying around.
You will need to do a bit of homework before making some of these, as two of the projects require you to premake some frit balls. The wreath needs red coarse frit to be melted and the angel requires medium black frit balls for eyes, although you could draw the eyes on with glassline paint if you wish.
Let’s get started!
 Project 1. Wee Christmas Wreaths.
For this project, you will need
4.5 x 4.5 square pieces of glass. As many as you like.
Coarse green frit
Red frit balls. You’ll need to premake these in advance.
Glastac or other glass glue
Copper or nichrome wire – a small amount to make the loop
Small scraps of clear glass
A pencil and paper
![]()
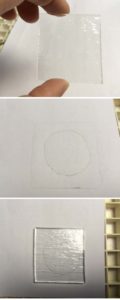
Cut a piece of glass 4.5 x 4.5cm square
Draw around the glass square and then draw a circle in the middle.
Place the square on top of the paper again so you can use the circle as a guide when placing the glass on top.
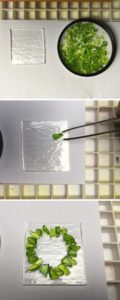
You will need some coarse glass frit in your desired colour. This one is Spring green transparent.
Start placing the frit in a circle around the line you have drawn.
Once you have frit all the way around the circle, stick it down with glastac glue.
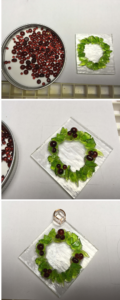
Grab your premade frit balls of varying size (made with coarse frit)
Add the fritballs so they resemble berries. Add some more green frit in a second layer to add depth to the wreath.
Add a loop made from your copper or nichrome wire and secure with a piece of clear glass on top.
These little wreaths should be fired as per the bullseye tack fuse schedule. I’ll put this in at the end for you.
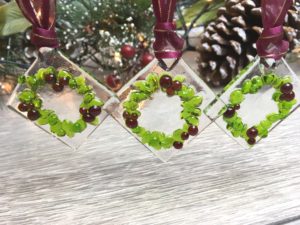
Project 2 Wee Trees
For this project, you will need
Small squares of clear glass 4.5cm x 4.5cm
Scraps of green and coloured glass
Glastac or other glass glue
Coarse frit in 3 or 4 contrasting colours
Copper or nichrome wire for the loop
Small offcuts of clear glass to secure the loop in place
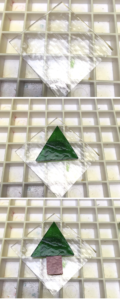
Cut a piece of glass 4.5 x 4.5cm square
Cut a triangle from a scrap of green glass and place on top of the square for the body of the tree.
Add a small rectangle of glass for the trunk. You can choose whatever colour you like. I love the green and red together.
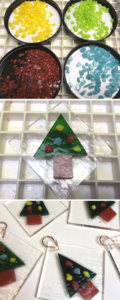
Choose a few different colours of frit which contrast with the green of the tree.
Place a few pieces of frit in different colours on top of the tree as decorations.
Add a loop of copper or nichrome wire to the decoration as we did in the last project. Secure with a small piece of clear glass on top of the loop,
Fire according to the normal bullseye tack fuse schedule.
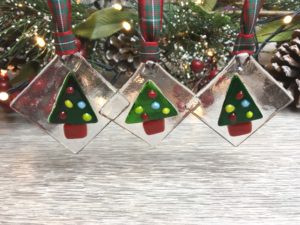
Project 3 Wee Angels
For this project, you will need
Squares of glass 4.5 x 4.5cm as many as you like
Scraps of coloured glass
Small scraps of pale pink or white glass
Fine white frit for the angel’s wings
Fine amber frit for the angel’s halo
Some tiny black frit balls made from medium frit for the eyes. Or glassline paint if you prefer.
A small amount of copper or nichrome wire to make the loop.
Small scraps of clear glass to secure the loop in place.
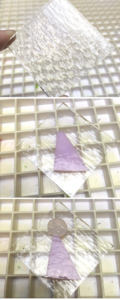
Cut a square of clear glass 4.5cm x 4.5cm
Cut a piece of coloured scrap glass in the shape of a tiny dress.
Cut a small circle of pale pink or white glass for the angel’s face. You’ll probably need to grind the edges to make them smooth. Be careful! As they are very small, it is easy to grind your fingers instead.
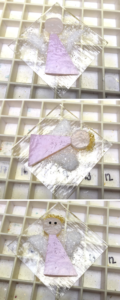
Add some frit for the wings of the angel. Try to place it exactly but don’t worry. You can easily move it around with a spatula or the end of some tweezers.
Place some amber frit above the angel’s head to make the halo.
Add some tiny frit balls for the eyes
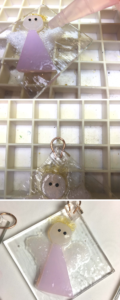
Stick everything down with some glastac glue
Make a loop with copper or nichrome wire and add to the top of the square. Add a small piece of scrap clear glass to secure the loop.
Isn’t she lovely!
Fire using the normal Bullseye tack fuse schedule.
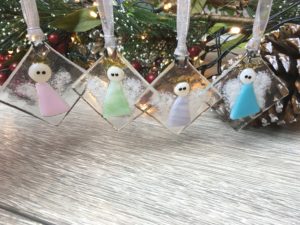
All three of these projects are fired in the kiln using the Bullseye tack fuse schedule. If you are using another type of glass you will need to adjust your firing schedule accordingly.
You can find all the bulleseye schedules here
Rate degrees/hr Temp – Set point Hold – Soak
1 222C (300F) 677C (1250F) 30mins
2 333C (600F) 760C (1400F) 10mins
3 999C (999F) 482C (900F) 120mins
4 83C (150F) 371C (700F) End
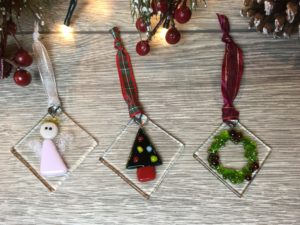
I hope you have fun making these. If you make them or do any new designs based on them, I’d love to know. You can post your pictures on the facebook page.


